
Creating the perfect black icing can be a challenge, but it’s a skill that can elevate your baking and decorating to the next level. Whether you’re aiming to craft spooky Halloween treats, elegant black-tie event cakes, or just looking to impress with your baking creativity, mastering black icing is a must.
This guide will walk you through the steps, tips, and tricks to achieve that deep, rich black icing that will stand out on any dessert.
Key Takeaways
- To create deep, rich black icing, start with your choice of icing base (buttercream, royal icing, or fondant) and gradually add black gel food coloring for the best intensity without altering the icing’s consistency too much.
- Gel food coloring is recommended over liquid or powder forms.
- After adding the initial coloring to achieve a dark gray tone, it’s essential to let the icing rest for a few hours.
Choosing Your Base
Icing generally consists of a base (like buttercream, royal icing, or fondant) combined with colorants. The challenge with black icing is achieving a deep, saturated color without compromising the icing’s taste or texture.
| Icing Type | Key Characteristics | Best Uses |
| Buttercream | – Versatile and easy to flavor – Creamy texture for smooth spreading or piping – Adjustable to stiff, medium, or thin consistency | Cakes and cupcakes |
| Royal Icing | – Dries hard, ideal for detailed work – Perfect for intricate designs that hold their shape – Fast-drying nature suitable for stacking decorated cookies | Detailed work on cookies |
| Fondant | – Can be rolled and shaped – Provides a smooth, elegant finish – Allows for sculpting and modeling, enabling the crafting of detailed figures and embellishments | Covering cakes, creating decorations |
Colorants: Gel vs. Liquid vs. Powder
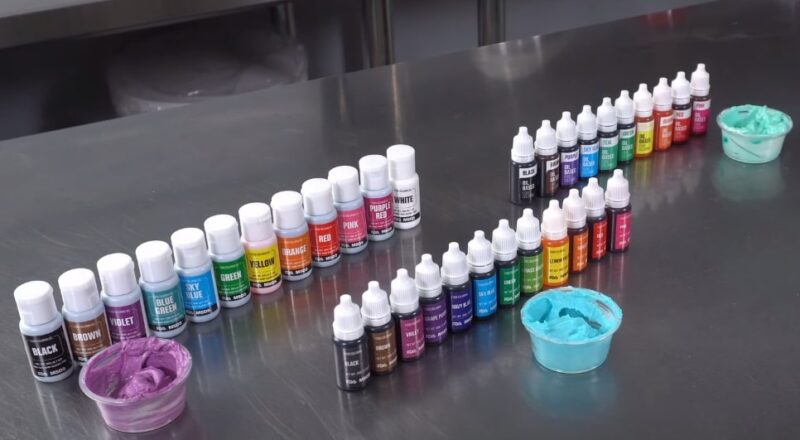
Gel colors are concentrated and provide vibrant colors without adding too much liquid. This makes them ideal for coloring without altering the icing’s consistency, which is especially important in intricate designs. Gel colors also tend to have a longer shelf life, making them a cost-effective option for regular bakers.
Liquid colors are readily available but may require a lot to achieve deep colors, potentially affecting the icing’s consistency. They’re a good choice for projects where a slight change in consistency isn’t critical, such as coloring cake batter. Liquid colors mix easily, making them user-friendly for beginners.
Powder colors are great for achieving intense colors without altering consistency but can be harder to find. They’re especially useful in dry mixes or when working with delicate ingredients that can’t tolerate additional moisture. Powder colors can also be used for dusting and shading, adding dimension to decorations.
Step-by-Step Guide to Making Black Icing
Ingredients and Tools
- Your icing base (buttercream, royal icing, or fondant),
- black gel food coloring (preferred for its intensity and minimal impact on consistency),
- a toothpick or skewer (for adding the color),
- a mixing bowl and spatula.
❗Ensure all tools are clean and dry before starting to prevent any unwanted moisture from affecting the icing consistency.❗
Instructions
Step 1 – Prepare Your Base: Start with your chosen icing base, ensuring it’s at the right consistency for your project. This step is crucial for the final outcome, as the base affects the icing’s ability to hold color and maintain its form on your dessert.
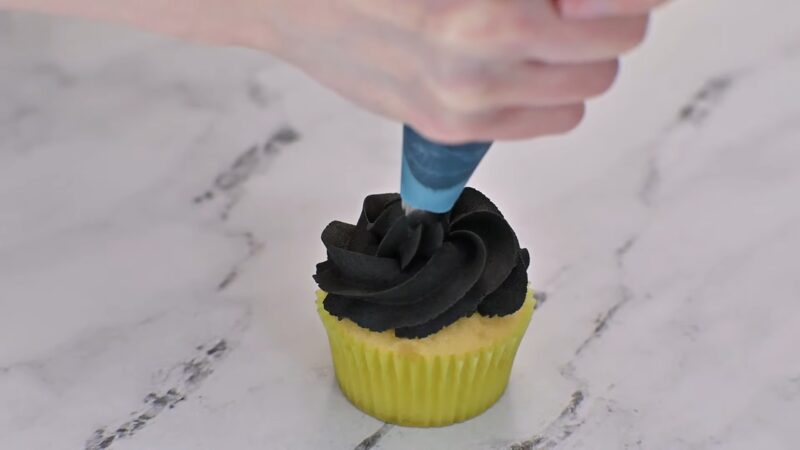
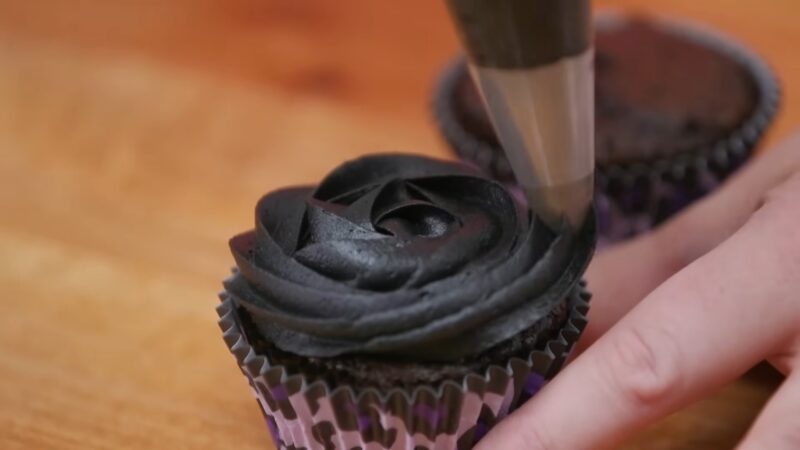
Step 2 – Add Color Gradually: Begin by adding a small amount of black gel color to your icing. Use a toothpick or skewer to add the colorant gradually. This method allows for precise control over the color intensity, reducing the risk of over-coloring and ensuring you reach the perfect shade of black.
Step 3 – Mix Thoroughly: Use your spatula to mix the color into the icing thoroughly. This ensures even distribution and prevents streaks or marbling, which can detract from the finished look of your baked goods.
Step 4 – Let It Rest: Once you’ve achieved a dark gray tone, cover your icing and let it sit for a few hours. The color will deepen over time, transforming into a rich black that’s more intense than it appeared when first mixed.
Step 5 – Adjust if Necessary: After resting, check the color. If it’s not deep enough, add a bit more colorant and let it rest again. This step is critical for achieving that deep, saturated black without having to start over or waste ingredients.
Tips for Perfect Icing
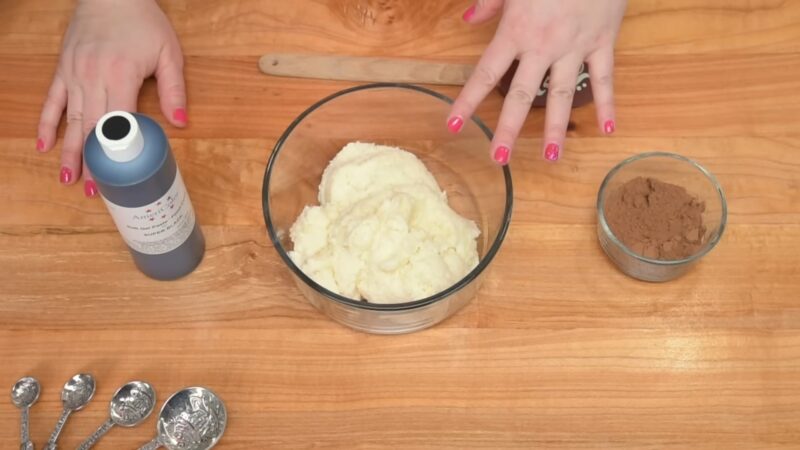
Start with Chocolate!
For buttercream or royal icing, beginning with a chocolate base can reduce the amount of black color needed, as you’re starting from a darker hue. This not only conserves your coloring but also can enhance the flavor of your icing.
Mind the Flavor
Adding a lot of colorants can affect taste. Choose a quality gel color designed to minimize this issue. If the icing does begin to taste slightly bitter, a small amount of sweetener or flavor extract can counterbalance the bitterness without altering the color.
Be Patient
Achieving the perfect shade of black takes time. Letting the icing rest allows the color to fully develop. This waiting period is essential for the color molecules to fully saturate the icing, deepening the shade to a true black.
Pay Attention to the Consistency
Adjust your icing consistency if needed, especially if adding significant amounts of colorant. If the icing becomes too thick, a few drops of water or liquid flavoring can help thin it to the desired consistency without diluting the color.
Test Small Batches
Before committing to coloring a large batch of icing, test with a small amount to ensure you’re happy with the color and taste. This precaution saves ingredients and ensures that your final product will meet your expectations.
Common Issues
1. Icing Too Liquid
If your icing becomes too runny after adding color, thicken it with more powdered sugar (for buttercream) or cornstarch (for royal icing). Adding these ingredients gradually allows you to achieve the desired consistency without over-correcting.
2. Color Isn’t Deep Enough
Patience is crucial. Let the icing sit to develop colorfully. If necessary, add a bit more colorant. This gradual approach helps prevent over-saturation and ensures that the color develops properly, resulting in a rich black instead of a dark gray.
3. Icing Tastes Bitter
High-quality gel colors are less likely to impart a bitter taste. If you encounter this issue, consider adding a bit of flavor extract to mask any bitterness. Vanilla, almond, and lemon extracts are popular choices that can complement the overall flavor of your icing without overwhelming it.
FAQs
Can I make black icing without using food coloring?
Yes, you can create a darker icing using natural ingredients like activated charcoal or cocoa powder, but achieving a true black without any food coloring can be challenging. Activated charcoal can provide a deep grey or black hue and is tasteless, while cocoa powder when used in large amounts, offers a dark brown color and adds a chocolate flavor.
How long does it take for black icing to reach its full color?
After adding the coloring, it might take a few hours for the icing to develop into a full, deep black. It’s recommended to let it sit for at least 2-3 hours, but overnight rest can often yield the best results.
Can black icing stain teeth or clothing?
Yes, similar to other food colorings, black icing can temporarily stain teeth or clothing. The intensity of the staining depends on the amount of food coloring used. It’s advisable to enjoy treats with black icing with care, especially at events where appearance is a concern.
Is there a way to lighten black icing if I’ve added too much color?
Lightening black icing is difficult once you’ve added too much coloring. The best approach is to mix the overly dark icing with more of your icing base to dilute the color until you reach a more desirable shade. This, however, might require a significant amount of additional icing.
How does the choice of icing base affect the final shade of black?
The initial color of your icing base can significantly impact the final shade. Starting with a lighter base, like vanilla buttercream, requires more colorant to achieve a deep black compared to starting with a chocolate base, which naturally requires less due to its already dark color.
The Bottom Line
With the right techniques and a bit of patience, you can create stunning, deeply colored designs that taste as good as they look. Practice makes perfect so don’t be afraid to experiment with different bases and colorants to find the combination that works best for you.